


The following steps outline the installation procedure:
1.Remove the factory ECU from the vehicle: Ensure the key is in the OFF position. The factory Altezza ECU is located in the engine bay on the left side of the vehicle. Remove the plastic cover (3 x 10mm head bolts) Unplug the wiring harness from the factory ECU. Remove the nuts that retain the ECU mounting structure and remove the ECU from the vehicle. DO NOT touch the exposed pins in the factory ECU connector.
2.Remove the factory ECUs circuit board from its enclosure: Ensure you are following the given anti-static guidelines and ARE WEARING A CONDUCTIVE WRIST STRAP connected to a conductive working surface. Remove the top cover by removing the screws. Remove the circuit board by removing the screws. Hold it only by the plastic header and place it aside.
3.Modify the case if required: It may be necessary to file three holes in the edge of the case for the tuning cable, expansion connector cable, and MAP hose to exit through. Ensure that any modifications are de-burred to prevent cutting into cable insulation.
4.Connect the ECU USB tuning cable and the expansion loom to the Link Plug-In ECU if required.
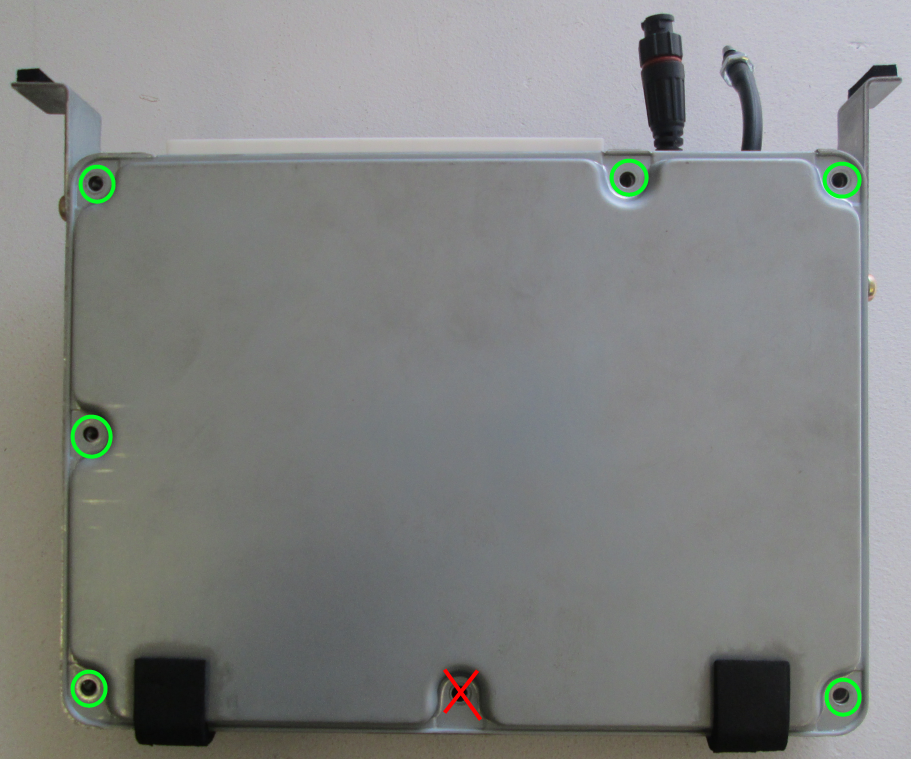
5.Fit the Link Plug-In ECU: Place the Link ECU into the case, carefully make sure the ECU is sitting flat in the case. Refit the top cover and fit the screws as shown in the image below.
6.Place the factory ECU in the packaging your Link ECU came in for protection.
7.Fit the ECU back to the vehicle.
8.Connect the ECU to the factory wiring loom.
9.Do NOT attempt to start the vehicle. Proceed to read through the remaining sections of this manual first.